Randy Brown

Crushing Step - Bēng Bù - 崩步

BengBu.png

Bēng Bù (Crushing Step 崩步) is a prevalent tào lù (form 套路) of tángláng quán. It stands as one of the more popular fighting sets on record for the mantis boxing style, and is a commonality amongst many of the branches of mantis boxing after it split during the turn of the 19th and 20th century.

Although the name translates as 'Crushing Step', this is a bit of a misnomer. Bēng means - ‘to collapse and fall into ruin’. Rather than an actual crushing ‘step’, Bēng Bù is more specifically about the ‘steps to Bēng’. The set is a series of techniques leading to the ‘collapse and fall into ruin’ of our opponent. This can be represented at times with single moves in the form such as crazy ghost fist, but there are many interconnected sequences of techniques as well.

A series of counters to counters, ultimately leading to the enemies collapse. Think about Rule of Three from our 12 boxer principles. While execution and power generation of a bēng dǎ (crushing strike 崩打) is riddled throughout the set, the overarching theme is causing the collapse of our foe in a myriad of ways.

The character (step 步), is defined as a step-by-step process. Or, in this case, using the step (footwork) to generate an ultimate end goal. Bēng Bù in its entirety, contains a myriad of attacks and positions that include - throws, grapples, plucks, kicks, elbow strikes, and more. Bēng however, is the foundation of this tào lù (form 套路).

The ‘engarde’ position known as ‘mantis catches cicada’ shows up in bēng bù right at the beginning. In bēng bù, as well as in other mantis sets, it is branded with the mantis hooks instead of the signature open palms found in other northern boxing sets such as plum boxing (meihuaquan).

At the end of the first road of bēng bù, there is a move often referred to as a ‘tiger tail kick’. There are versions with one instance of this as you start the second road, and others that end the first road with this move, and then repeat it in the opposite direction before heading into road two of the form.

Plum Flower Maiden Dancing from Pole to Pole. Circa 1880. Source: Wikimedia (though I believe that Stanley Henning was the first person to publish this image in his essay for Green and Svinth.)

Thanks to an article done by Ben Judkins on his Kung Fu Tea blog, I found a drawing of this exact same move. The article - “Research Notes: “Background of Meihuaquan’s Development During Ming and Qing Dynasties” By Zhang Guodong and Li Yun” discusses the influence meihuaquan had on the area of Shandong during the late 1800’s. This same ‘tiger tail kick’ move, as seen in the drawing from 1880, is inside the meihuaquan forms.

This plum boxing influence on such a staple form as bēng bù, draws into question any uniqueness of the techniques within, and points to a larger common vernacular of boxing methods found amongst styles in northern China during this time period.

As with many other tanglangquan forms, it is an exciting set to delve into with many great combinations inside.

Crushing Step Lexicon

Road 1

  1. Crazy Ghost Fist

  2. Mantis Catches Cicada

  3. Thrust Palm Closing Attack

  4. Knee Hook Lapel Punch

  5. Leg Hook Lapel Punch

  6. Falling Elbow/Reaping Leg

  7. Rowing Hook

Road 2

  1. Tiger Tail Kick

  2. Double Sealing Hands

  3. Chop with Fist

  4. Deflect Parry Punch

  5. Rowing Hook

  6. Thrust Palm Closing Attack

  7. Knee Hook with Lapel Punch

  8. Step Up to Double Seal

  9. Waist Chop

  10. Wicked Knee

  11. Beatdown Chop

  12. Rising Elbow to Double Seal w/ Wrist Bind

Road 3

  1. Seize Leg

  2. Seize Leg

  3. Closing Door Kick w/ Eye Plunder

  4. Piercing Hook

  5. Point At Star

  6. Change Moon

  7. Lifting Hook with Leg Hook

  8. Catch Kick & Leg Hook

  9. Seize Leg

Road 4

  1. Seize Leg

  2. Seize Leg

  3. Waist Chop

  4. Circle Punch

  5. Rowing Hook

  6. Lapel Punch w/ Trip

  7. Closing

Crushing Step Applications
Road 1

01 - Crazy Ghost Fist

04 - Knee Hook Lapel Punch

06 - Falling Elbow

03 - Thrust Palm Closing Attack

05 - Leg Hook Lapel Punch

07 - Rowing Hook


Crushing Step Applications
Road 2

01 - Tiger Tail Kick

03 - Chop with Fist

05 - Rowing Hook with 7 Star

07 - Knee Hook Lapel Punch

09 - Waist Chop


11 - Beatdown Chop


02 - Double Sealing Hands

04 - Deflect Parry Punch


06 - Thrust Palm Closing Attack

08 - Double Sealing Hands


10 - Wicked Knee

Timestamp - 00:49

12 - Sticky Elbow


Staff Fighting

Staff Fighting

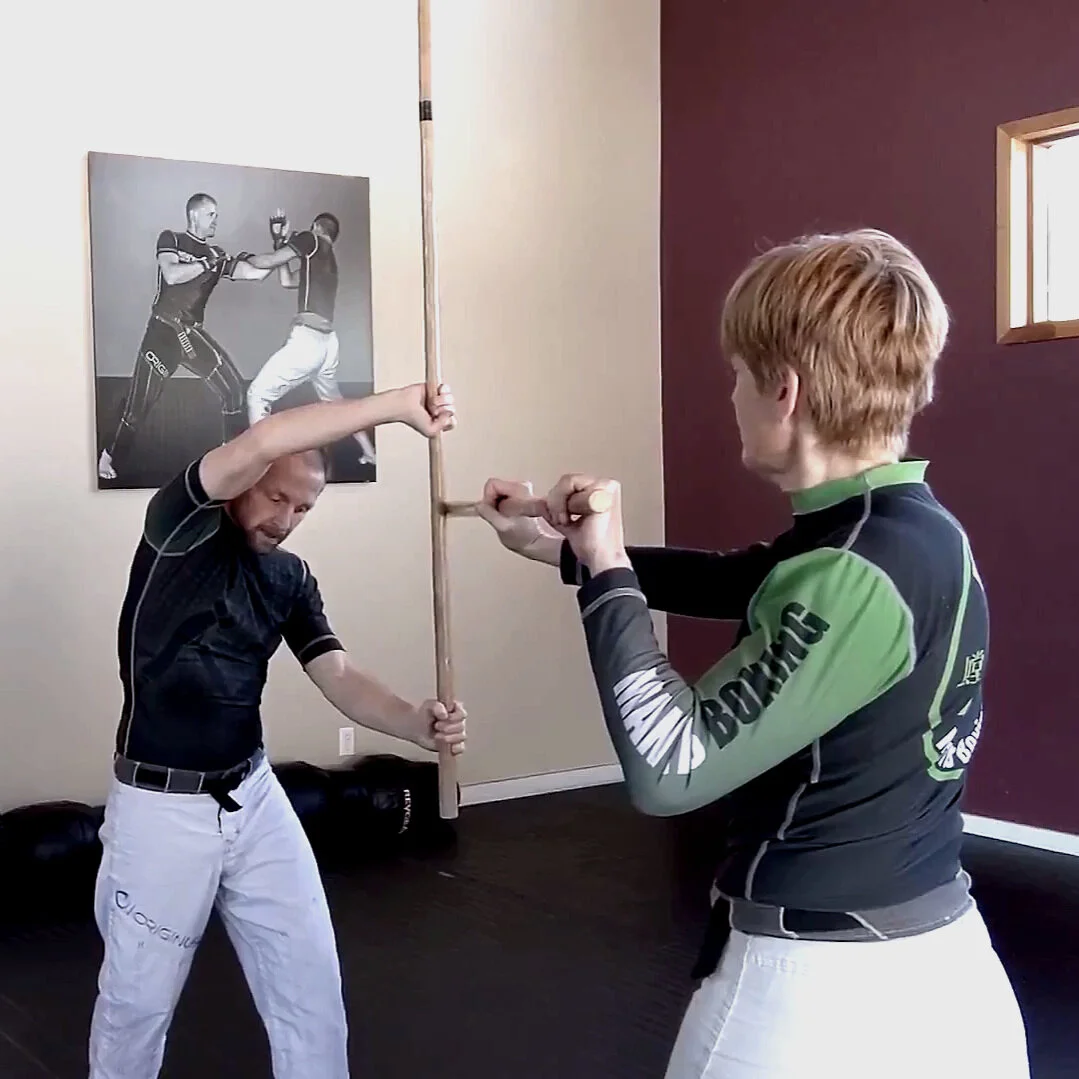
The staff, the grandfather of all weapons. There is nothing simpler than picking up a stick to hit someone with. This is the first of many weapons I was trained on over the years, and perhaps the one nearest to my heart. Simple, deadly, and versatile. The range of skill travels the spectrum so a novice can use this to maximum effectiveness, and a skilled weapons handler can wreak havoc on a battlefield.

Taming the Lion - BJJ Course

Choke Submissions for the Ground

The primary attack methods for ground fighting outside of striking are submissions using chokes and locks. While joint locks are fast and effective, they can often be countered or resisted by bigger and stronger opponents.

Chokes on the other hand, are powerful tools to defeat an opponent of any size. In this course I’ll cover how to train the variety of chokes available to us either with a jacket, or without.

Understanding Chokes


Note: Solo Training Drills

A grappling dummy is highly recommended if you do not have a training partner to work with. You can also use a large pillow with a jacket wrapped around it.


THE CHOKES

Triangle Choke

RNC - Rear Naked Choke

Cross Collar Choke

Ezekiel Choke


Submission Training - Mission 1

Chokes

Perform 3 Sets of 10:

  1. Triangle Choke

  2. Rear Naked Choke

  3. Ezekiel Choke

  4. Cross Collar Choke (Mount variation)

  5. Cross Collar Choke (guard variation)


Chokes Applied

Underhook Choke

Bow and Arrow Choke


Arm Triangle Choke


Seal Tightly


Training Mission 2
Chokes Con’t

Perform 5 of ea Choke rotating for 3 minutes. Break 1 min. Repeat 5x:

  1. Underhook Choke

  2. Bow and Arrow Choke

  3. Arm Triangle Choke

  4. Seal Tightly


Guillotine

Baseball Bat Choke

Anaconda

Clock Choke

The Loop Choke

Submission Training - Mission 3

Chokes

Perform 3 Sets of 10:

  1. Guillotine

  2. Anaconda

  3. Baseball Bat

  4. Clock Choke

  5. Loop Choke

Arm Assault - Submissions for the Ground II

Ground Submissions Lexicon

One of the easiest methods to classifying submissions is anatomic association to each joint of the body.


Shoulder Locks

  • Keylock (Americana)

  • Hammerlock (Kimura, Omoplata)

Elbow Locks

  • Arm bar (inverted, mount, violin, folding, flying)

Wrist Locks

  • Folding

  • Twisting

Finger Locks

  • Folding


Shoulder Locks

Omoplata - Hammerlock with Leg


Elbow Locks

Solo Arm Bar Training

The Violin Armbar


Sweeps - Throws on the Ground

Sweeps - Throws on the Ground

Welcome to sweeps training - aka - throws on the ground. Tossing an opponent like a salad. Pulling off a sweep in the ground fighting stage is an exciting moment that fills us with exhilaration and a sense of victory. These powerful moves are fundamental to our jiu-jitsu arsenal, yet are so often…

How to Defeat the BJJ Guard in 4 Easy Steps

Free Code for Members:
0yvprk8


The 4 Steps to Defeat the BJJ Guard

The order of execution in guard passing is instrumental in our success. Skip one of these steps and it usually ends in our demise. The following are the steps, or a sequence, we use in approaching guard passing as a methodical process. Order from chaos:

  1. Base

  2. Break

  3. Control

  4. Pass

Step 1 - Base

The foundation (no pun intended) for any guard passing begins with the base. A solid base is entirely focused on stability and sweep prevention. Without it, we’re doomed. The following points will help us create an effective base to build our guard passing game upon:

Rectangle vs Trapezoid

The overall shape of our body in the base should tell all. A rectangle standing vertical, is far easier to push over than a trapezoid. See the photos for examples.

3 Points of Contact

It is imperative that we maintain 3 or more points of contact the entire time we base, break, and pass. There are exceptions to this rule when we involve advanced guard passing concepts, but for now - 'learn the rule, embody the rule, and then you can break the rule.’

The Sunken Center (cg)

Our bodies Center of Gravity (cg) is located a few centimeters below the navel when standing and kneeling. As we execute basing and breaking, we want to keep our cg as low to the ground as possible.

Block the Sit-Up

Our third point of contact aside from our legs, should be blocking the opponents sit-up. This prevents them from getting up, or choking us as we are in guard.

Arm position for submission prevention

Keep the arms at a good midway point, usually around the opponents solar plexus to prevent the arms from extending too far out where they can execute arm bar submissions on us. Too far back, and we’ll be the victim of a leg triangle submission.

Step 1.2 - Grip Breaking

I have seen people that are extremely successful with breaking grips. In my experience as a smaller grappler/boxer, grip breaking has always been more of a liability than an asset. Especially when inside an opponent's closed guard.

Usually the grip break requires me to lose my ‘3 points of contact’ in order to initiate it. This is very dangerous and compromises our base, which in turn sets us up for a stronger opponent to knock us down.

Additionally, and I found this in stand-up grappling as well, whenever we take our attention away from basing and breaking, we are opening ourselves up for another attack.

If you do choose to fight grips while inside closed guard, then remember this important piece - ‘you break it, you bought it’. This means, if you break a grip, you have to keep control of that arm or it will just grab you again in the same place, or somewhere else.

It’s an interesting game, and far be it from me to dissuade anyone from trying it. If it is of interest, I suggest learning that from someone who is really good at it. Personally, I find it to be the game of defense, and always being one move behind the enemy.

Much of the passing and guard work we’ll deal with here, involves a different strategy - ‘Neutralize the Grips.’ We’ll be moving and using principles that will nullify the grips and holds of our opponent, and at times, use them to our advantage.

Whether we break grips, or not, once we establish a solid base, we need to think about how to break the guard…

Step 2 - Break

Break the Guard

Breaking guard is rife with challenges. Not only do we have a method and sequence to this phase, we have to monitor our posture, base, and technique, all while an opponent is trying to sweep and submit us, or at the least, creating problems for us. This is an extremely dynamic phase of the ground game. To ensure success, we want to work from principles

Basic Methods of Breaking - Gi Variants

  • Double Belt Push
    The first break you’ll learn. Starting with the arms on the chest, walk one hand at a time down to the belt. As soon as the first hand arrives, push the belt toward the opponents head, not their abdomen. Then grip the belt with the second hand and apply continued pressure. Staying low with the cg, walk the knees back one space each, being careful not to overstep. (see posture above).

  • Diagonal Base Break
    Using one hand on the lapel located at the solar plexus (ensure a strong grip here) push on the belt with the other hand. Keep the elbow tight as you move next. Take one knee and shift it to align with the opponent's spine. Pressure back on their legs with your back. You can walk the hand that was on the belt, further down to the hip, or if safe, even the knee. It is important here to have good control. If the opponent controls our grip, we can be triangled here. If the pressure is maintained on the solar plexus, and we stretch back, we are defending that triangle as we break the guard. Failure to keep our grips/position, will lead to our demise.

Basic Methods of Breaking - No-Gi Variants

  • Sealing Tightly
    Pinning the arm across the body and using it as the platform to break. This is the number one go to for a no-gi situation where someone has no belt, or their pants are extremely flimsy, or stretchy, and unable to support the grips required to break.

  • Double Under
    Same break as above, but performed with no-gi by palming pectoral minor and the deltoid muscle. Use of an eagle claw grip on pectoral minor can also increase success here.

Size Matters


Using breaking methods against taller grapplers can be a nuisance. Their legs are longer, making it difficult to stretch the legs far enough to keep pressure. The good news is, there are alternative breaking methods that larger opponents find extremely difficult to close down.

  • Double Lapel to Bipod
    This is a great pass for smaller vs taller where you cannot extend the person’s guard enough to pressure their legs open. Starting from the same base position, grab a same-side lapel in each hand. Punch the lapels up and underneath the opponents underarms as you stand to a bipod position while keeping the head low. Generally it is a good idea to drive the forehead into their solar plexus. Next, bring one leg to the center, in line with their spine. Sit down to the combat position while bringing the knee of the center leg to your chest. This will pry open the guard completely, or enough to be able to get to the combat base where you can then continue to work the full break.

Common Failures in Breaking Guard

Posture is a predominant factor guard breaking. Without proper posture, we will either be swept easily by a larger, stronger foe, or we will fail to apply appropriate pressure at the right geometric angle to break the guard.

  • Flat Back - this one is common when facing larger opponents as the tendency is for us to solve lack of pressure, by walking our knees back further and further trying to force open the guard. As the knees go further back, our trapezoid disappears, and we’re back to that rectangle we do not want. NOT TO BE CONFUSED WITH LOW HEAD/SHOULDER POSTURE.

  • Upright - the opposite of the flat back, is sitting up straight. This is a big mistake that can lead to being pushed completely backwards landing under the mount position of our opponent.

  • The 45 - 45 degree angle of spine posture creates a good angle of attack. This can vary +/- 10 to 15 degrees based on our opponents attack strategy.

  • No Pop-Tarts - during the breaking phase it is common for us to want to lift our cg in order to move, or push on our opponent. Keeping the center low as we move to break, can prevent sweeps from our opponent, or allow us to regain a strong position in their guard if they are aggressively trying to toss us. The higher our cg in this scenario, the more they will rock us, and the bigger our corrections will be. The larger the correction, the greater window of opportunity for our opponent to gain what they want.

Step 3 - Control

Controlling the Guard

Before we initiate the guard pass, it is imperative to maintain control of the guard. Against an unseasoned ground fighter, without this step we may get lucky and still affect a guard pass, but it is bad practice. Controlling guard is all about proper grips, and/or blocking.

Walking the Ladder

Think of our opponent as a ladder. When we break guard we are essentially climbing down a ladder toward their feet; walking our hands, or control points incrementally as we go. If we skipped a rung of a real ladder, we will likely fall.

In BJJ, we’re already on the ground, but we still experience the metaphorical descent after missing a rung of this imaginary ladder. Without proper controls, this point of the guard break/pass maneuvering is where our opponent is most likely to succeed with a sweep, submission, or at the least, re-pull of guard.

Much of this can be stopped if we know how to control their guard.

Where to grip

Control Points - each of these is relative to the type of pass we’ll discuss in phase 4.

  • Solar Plexus

  • Hips

  • Thighs

  • Knees

  • Ankles

As you will see in the following passes, we’re controlling the opponent at one or more of the above locations as we perform each pass.

Step 4 - Pass

Pass the Guard

Basic Ground Passes

There are many guard passes, but the following examples are the passes specifically address some of the more common positions an opponent will take up once their guard is broken.

  • Knee Slice Pass

  • Knee Slice Variation w/ Baseball Slide

  • Double Under Pass

  • Weave Through Pass

Basic Standing Guard Passes

  • Double Stuff

  • Double Toss

  • Knee to Belly

Wash, Rinse, Repeat

If step 2, or 3 fail, we need to go back to step 1. If step 4 fails, we can at times, simply back up to step 3. If they re-pull guard however, we need to go back to step 1 and work our way down the ladder again.

Passing Advanced Open Guards & Passing

In addition to the basic categorization of ‘closed’ and ‘open’ guard, there are advanced open guards that will require more complex solutions to defeat. These include but are not limited to:

  • Spider guard

  • De La Riva guard

  • Leg lasso

  • Half-guard

  • Deep-half

  • Knee shield

  • 50/50

  • X-guard

  • Butterfly guard

  • Mantis guard

These guards each require specific base, breaks, controls, and passes to neutralize and counter.

See Advanced Guard Breaking & Passing for more on defeating these advanced open guards. Also includes more passes such as - Toreando Pass, Knee on Hip w/ Break, and more.

Here is an example of one guard we’ll address later. The spider guard.

How to Kill the Spider Guard


Escaping Side Control

Escaping Side Control

Side Control - one of the 4 dominant positions in ground fighting. When we’re on the top, this can be an incredibly effective means of controlling and opponent. When we’re on the bottom, it can feel like an inescapable hell that we are trapped in with not way out.

In this course, we’ll learn each of the varying positions of side control, and how they work, so when we learn the escapes, we can recognize the position we’re trapped in, and know which escapes will not work, and which ones will.

Strike Defense

Strike Defense

Knowing how to block strikes is an integral part of our boxing skills. This provides for our primary defense against an aggressor, but also builds a foundation for our counter-striking skills that we add later. Dive into these skills and learn to block all manner of strikes an enemy can throw your way.

Summary Boxing Set (Zhāi Yào 摘要)

 
ZhaiYao-thumb.png
 

Summary Boxing Sequence

Zhāi Yào Tào Lù

摘要套路

See further below for the boxing instruction set, and links to many of the fighting applications. When learning the boxing set, you can follow my recommended training missions below each lesson. I recommend sticking to a lesson until you feel comfortable to proceed.


Lesson 1 - 1st Road - Part 1

Zhai Yao - Training Mission 1

See lesson 1 video above for sequence. It is recommended to practice this a few times in a week, or as much as you are comfortable.

1st Road - Part 1 - Perform - 3 Sets of 10

  1. Crazy Ghost Fist

  2. Toe Kick

  3. Mantis Catches Cicada with Crushing Knee

  4. Thrust Palm Closing Attack

Lesson 2 - 1st Road - Part 2

Zhai Yao - Training Mission 2

See video above for sequence.

1st Road - Part 1 - Perform - 3 Sets of 10

1st Road - Part 2 - Perform - 3 Sets of 10

  1. Knee Hook Lapel Punch

  2. Leg Hook - Blue Heron Spreads Wings

  3. White Ape Falls in Hole

  4. Tiger Tail Throw


Lesson 3 - 2nd Road - Part 1

Zhai Yao - Training Mission 3

See video above for sequence.

1st Road - Part 1 - Perform - 10x

1st Road - Part 2 - Perform - 10x

2nd Road - Part 1 - Perform - ​3 Sets of 10

  1. Double Seal

  2. Beat down Chop

  3. Closing Door Kick

  4. Drilling Fist

  5. Three-Section Step to Crush

Lesson 4 - 2nd Road - Part 2

Zhai Yao - Training Mission 4

1st Road - Perform - 10x

2nd Road - Part 1 - Perform - ​10x

2nd Road - Part 2 - Perform - ​20x

  1. Ankle Pick to Lifting Hook

  2. Crashing Tide (monkey variation)

  3. Double Seal

  4. Diagonal Flying

  5. Wicked Knee

After completing all sections - perform entire set ​10x


Lesson 5 - 2nd Road - Part 3

Zhai Yao - Training Mission 5

1st Road - Perform - 5x

2nd Road - Part 1 & 2 - Perform - ​10x

2nd Road - Part 3 - Perform 20x

  1. Beatdown Chop

  2. Crashing Tide (7 Star Variation)

  3. Double Push

  4. Break the Chains

  5. Twisting Hook

After completing all sections - perform entire set ​10x

Lesson 6 - 3rd Road - Part 1

Zhai Yao - Training Mission 6

1st Road & 2nd Road together - Perform - 10x

3rd Road - part 1 - Perform 20x

After completing all sections - perform entire set ​3x

  1. Twisting Hook

  2. Rowing Hook (7 star variation)

  3. Piercing Hook

  4. Point at Star

  5. Leg Hook - Change Moon


Lesson 7 - 3rd Road - Part 2

Zhai Yao - Training Mission 7

1st Road & 2nd Road together - Perform - 5x

3rd Road - part 1 - Perform 10x

3rd Road - part 2 - Perform 20x

After completing all sections - perform entire set ​3x

  1. Double Clinching Hooks w/ Crushing Knee
    Hook

  2. Temple Step to Lifting Hook

  3. Tiger Tail Throw

  4. Crashing Tide

Lesson 8 - 3rd Road - Part 3

Zhai Yao - Training Mission 8

1st Road & 2nd Road together - Perform - 5x

3rd Road - part 1 - Perform 10x

3rd Road - part 2 - Perform 10x

3rd Road - part 3 - Perform 20x

After completing all sections - perform entire set ​3x

  1. Monkey Steals Peach

  2. Circle, Scrape

  3. Heel Kick

  4. Mantis Captures Prey

  5. Blocking Hook


Lesson 9 - 4th Road - Part 1

Zhai Yao - Training Mission 9

1st, 2nd, & 3rd Roads together - Perform - 5x

3rd Road - Perform 5x

4th Road - part 1 - Perform 20x

After completing all sections - perform entire set ​3x

  1. Seizing Hook

  2. Shoveling Hook

  3. Inside Elbow

  4. Circle Punch, Heel Kick

  5. Tame Tiger

Lesson 10 - 4th Road - Part 2

Zhai Yao - Training Mission 10

1st, 2nd, & 3rd Roads together - Perform - 3x

4th Road - part 1 - Perform 10x

4th Road - part 2 - Perform 20x

After completing all sections - perform entire set ​3x

  1. Rowing Hook (single leg)

  2. Spinning Hook

  3. Hanging Hook L/R

  4. Crashing Tide

  5. 3 Section Step to Crushing Strike


Lesson 11 - 4th Road - Part 3

Zhai Yao - Training Mission 11

1st, 2nd, & 3rd Roads together - Perform - 3x

4th Road - part 1 & 2 - Perform 15x

4th Road - part 3 - Perform 20x

After completing all sections - perform entire set ​3x

  1. Cross Kick

  2. Side Kick

  3. Circle Punch to Clinching Hook w/ Crushing Knee

  4. Guillotine to Rising Choke

Lesson 12 - 4th Road - Part 4

Zhai Yao - Training Mission 12

1st, 2nd, & 3rd Roads together - Perform - 3x

4th Road - part 1, 2 & 3 - Perform 15x

4th Road - part 4 - Perform 20x

After completing all sections - perform entire set ​3x

  1. Over the Knee

  2. Clinching Hook to Dragging Hook

  3. Anchor Drop

  4. Close

fin


Quán Pǔ (拳谱)

A quán pǔ (boxing set 拳谱) is a list of instructions, a chart outlining the system, or piece of the system. Most Chinese martial arts forms are accompanied with an instructional list of moves such as this. Unique names to help one remember what to do next — mnemonics.

The names of each move can be extremely difficult to translate. Guessing at times to the creators intent/meaning. If one is going by the name alone it can be close to impossible to crack the code. In many cases these names have localized meanings connected to a village, region, time period of origin, mythical backstory, local legend, or they are specific to the boxing founder themselves. In many cases they reference some movement, for example an animal.

If an outside viewer is not familiar with each of these names then it has no meaning to you other than assisting the learning process. An example from my life could be the word ‘hornpout’, a term we used for catfish while growing up in New Hampshire, USA. It wasn’t until I was in the military and stationed in other parts of the country that I realized no one else knew what a hornpout is. Even more aggregious, they had never had a fluffernutter!!!

Therefore, keeping the applications of the moves intact with each of the moves found in a set is of utmost import.

Roads

These boxing sets were typically divided into sections which we refer to as roads. The end of a road is, like most boxing sets, demarcated by a 180 degree direction change.


Zhāi Yào Lexicon

See ‘Applications’ section for combative methods.

1st Road

  1. Crazy Ghost Fist

  2. Toe Kick

  3. Mantis Catches Cicada w/ Crushing Knee

  4. Thrust Palm Closing Attack

  5. Knee Hook Lapel Punch

  6. Leg Hook - Blue Heron Spreads Wings

  7. White Ape Falls in Hole

  8. Tiger Tail Throw

2nd Road

  1. Double Seal

  2. Beat down Chop

  3. Closing Door Kick

  4. Drilling Fist

  5. Three-Section Step to Crushing Fist

  6. Ankle Hook to Lifting Hook

  7. Crashing Tide (monkey variation)

  8. Double Seal

  9. Diagonal Flying

  10. Wicked Knee

  11. Step fwd Beat Down Chop Fist (right)

  12. Crashing Tide - 7* variation

  13. Waist Chop/Double Push

  14. Break the Chains

3rd Road

  1. Twisting Hook

  2. Rowing Hook (7 star variation)

  3. Piercing Hook

  4. Point at Star

  5. Change Moon

  6. Double Clinching Hooks w/ Crushing Knee

  7. Temple Step to Lifting Hook

  8. Tiger Tail Throw

  9. Crashing Tide

  10. Monkey Steals Peach

  11. Circle, Scrape

  12. Heel Kick

  13. Mantis Captures Prey

  14. Blocking Hook

4th Road

  1. Seizing Hook

  2. Shoveling Hook

  3. Inside Elbow

  4. Circle Punch, Heel Kick

  5. Tame Tiger

  6. Rowing Hook (single leg)

  7. Spinning Hook

  8. Hanging Hook L/R

  9. Crashing Tide

  10. 3 Section Step to Crushing Strike

  11. Cross Kick

  12. Side Kick

  13. Circle Punch to Clinching Hook w/ Crushing Knee
    Keyword Combo - use enter—strike—connect—stick—hook—clinch—pluck—to strike with knee.

  14. Guillotine to Rising Choke

  15. Over the Knee

  16. Clinching Hook to Dragging Hook

  17. Anchor Drop

  18. Close


Summary Set Applications
Road 1

01 - Crazy Ghost Fist

03 - Mantis Catches Cicada

Timestamp - 02:12

04 - Thrust Palm Closing Attack

06 - Leg Hook

02:48 - Blue Heron Spreads Wings Variant

02 - Toe Kick

Mantis Catches Cicada - Con’t

Timestamp - 04:00

05 - Knee Hook Lapel Punch

07 - White Ape Falls In Hole

Timestamp - 02:00 - Hammerlock Takedown

08 - Tiger Tail Throw


Summary Set Applications
Road 2

01 - Double Seal

03 - Closing Door Kick

02 - Beatdown Chop

04 -Drilling Fist


05 - 3 Section Step

06 - Ankle Hook to Lifting Hook

Timestamp - 00:50

09 - Diagonal Flying

11 - Beat Down Chop

13 - Waist Chop

Timestamp - 3:41

07 - Crashing Tide

Timestamp - 02:57 - Monkey variant

10 - Wicked Knee

Timestamp - 00:49

12 - Crashing Tide - v2

14 - Break the Chains


Summary Set Applications
Road 3

01 - Twisting Hook

Timestamp - 02:20

03 - Piercing Hook

Timestamp - 02:48

05 - Change Moon


07 - Lifting Hook

Timestamp - 00:50

09 - Crashing Tide

Timestamp - 02:57

11a - Circle

Timestamp - 01:55

12 - Heel Kick

Timestamp - 01:14

02 - Rowing Hook w/ 7 star

04 - Point At Star

06 - Double Hooks with Crushing Knee

Timestamp - 1:04

08 - Tiger Tail Throw

10 - Monkey Steals Peach

11b - Scrape

Timestamp - 01:18

13 - Mantis Captures Prey

14 - Blocking Hook

Timestamp - 01:43


Summary Set Applications
Road 4


01 - Seize Leg

03 - Inside Elbow

Timestamp: 05:59

05 - Tame Tiger

07 - Spinning Hook

coming soon…


09 - Crashing Tide

Timestamp: 02:57

11 - Cross Kick

13 - Circle to Clinch

Timestamp - 00:22

15 - Over the Knee


02 - Shoveling Hook

04 - Circle Punch - Heel Kick

06 - Rowing Hook (single leg)

08 - Hanging Hook

Timestamp: 01:00

10 - 3 Section Step to Crush

Coming soon…


12 - Side Kick

14 - Guillotine to Rising Up

Timestamp: 01:48

16 - Dragging Hook

17 - Anchor Drop

Timestamp - 00:25